AWS Organization Onboarding
If you select Deploy AWS Organization when onboarding your AWS account (Advanced Mode only), you will see additional steps for launching a CloudFormation StackSet after the initial stack creation has completed. This article details the steps to onboard your AWS Organization to Panoptica using the CloudFormation StackSet service.
As described in AWS Onboarding, connecting an organization is a two step process: after creating a CloudFormation Stack, you then configure a StackSet and onboard your member accounts.
Prerequisites
- Enable StackSet trusted access with AWS Organizations. An AWS guide on how to do this can be found here. Note that this requires an Admin on the management account.
- The user performing the onboarding must have the relevant permissions to create and deploy CloudFormation Stacks and StackSets. See AWS Onboarding - Roles, Policies, and Permissions for details.
- If you have already onboarded accounts in this Organization to Panoptica via the regular onboarding flow, they must be deleted from Panoptica (via the account page) before the AWS organization onboarding begins.
Onboarding Process
Step 1:
- Log into your organization management (master) account in AWS. The process is smoother if you're logged into AWS beforehand.
- In the Panoptica console, select Settings in the main navigation pane, then the Accounts tab. Choose Amazon Web Services to open a pop-up overlay.
- Select Advanced Mode, and Deploy AWS organization. Follow the Advanced Mode steps to Onboard an AWS account.
- When you click Launch Stack, a new browser tab will open to your AWS console.
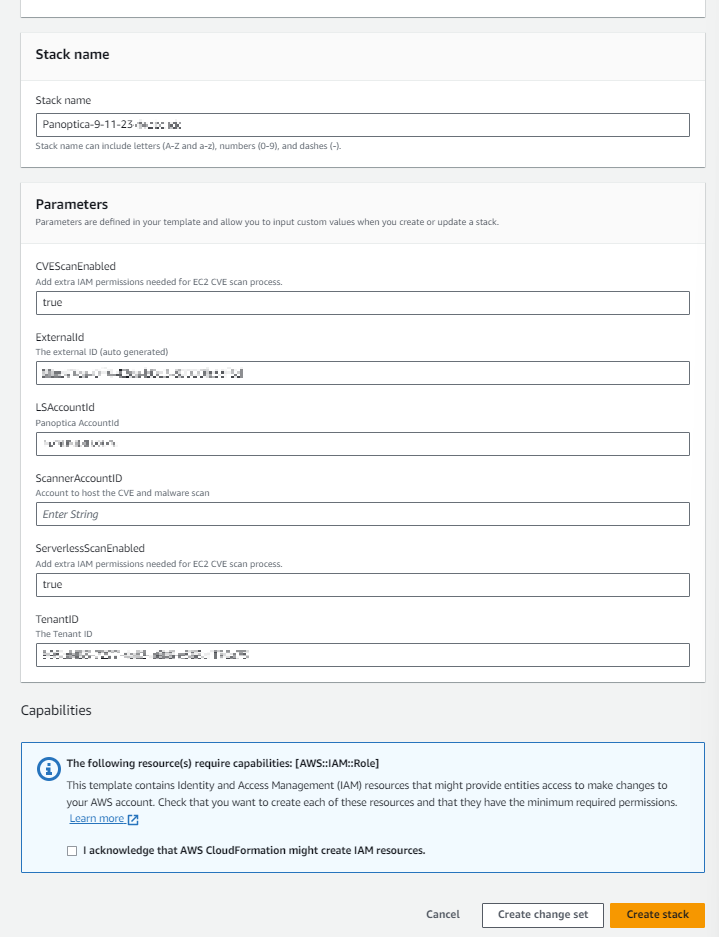
- Select the I acknowledge that AWS CloudFormation might create IAM resources checkbox, and then click Create Stack. You can change the Stack name field if you want.

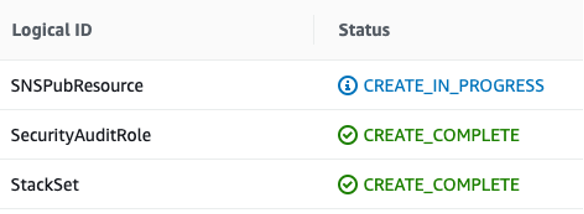
- CloudFormation will deploy the resources in the management account so that you can see the creation status in AWS and make sure you see three resources with “CREATE_COMPLETE” status.
The deployed resources are:- A role on the management account so Panoptica can scan it.
- A StackSet to onboard the member accounts.
- An SNS alerting Panoptica to the new account, so we can onboard and automatically scan it.

Once all three resources show "CREATE_COMPLETE" under Status, the first step is done.
Your management account should be onboarded to Panoptica shortly thereafter, and the scan will automatically start after that. In addition, we've created the StackSet required for Step 2 - onboarding the member accounts.
Step 2:
- Once all resources are created successfully, click StackSets from the menu to the left, and then click the PanopticaSecurityAudit StackSet that was created.

- Click the Actions drop-down menu and select the Add stacks to StackSet option.

- Set deployment targets:
We recommend onboarding the entire Organization, but you can choose to onboard accounts from specific OUs (Organizational Units) as well.

- Specify regions:
Select the US East (Ohio) region from the drop-down list. Once done, click Next.

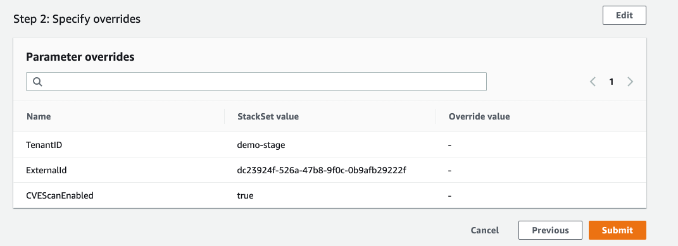
- Click Next again in the next step, and after the final review click Submit to start the deployment.

Congratulations! You can now view the “Stack instances” tab to see the status of each account's deployment.

Each account that was successfully deployed should be onboarded and scanned in a matter of minutes. You can see the accounts and their statuses in Panoptica’s Accounts page.
Note:
For larger Organizations, the initial scan of all accounts may take some time to complete.
Updated 8 months ago
