GitHub PR Scanning
Panoptica's pull request (PR) scanning enhances the security of your codebase by automatically scanning pull requests for potential security vulnerabilities. PR scanning provides a streamlined approach to identifying and remedying security issues within your development workflow in realtime, enabling you to detect and address security issues before they are merged into the main codebase.
Pull request scanning detects Infrastructure-as-Code (IaC) configurations, code weaknesses, and secret leaks, and displays findings right in your GitHub environment. At the moment, PR scanning is available for GitHub repositories only.
Configuration
Before you can configure PR scanning in GitHub, you obviously need to first integrate your GitHub repository with Panoptica, by installing our GitHub application.
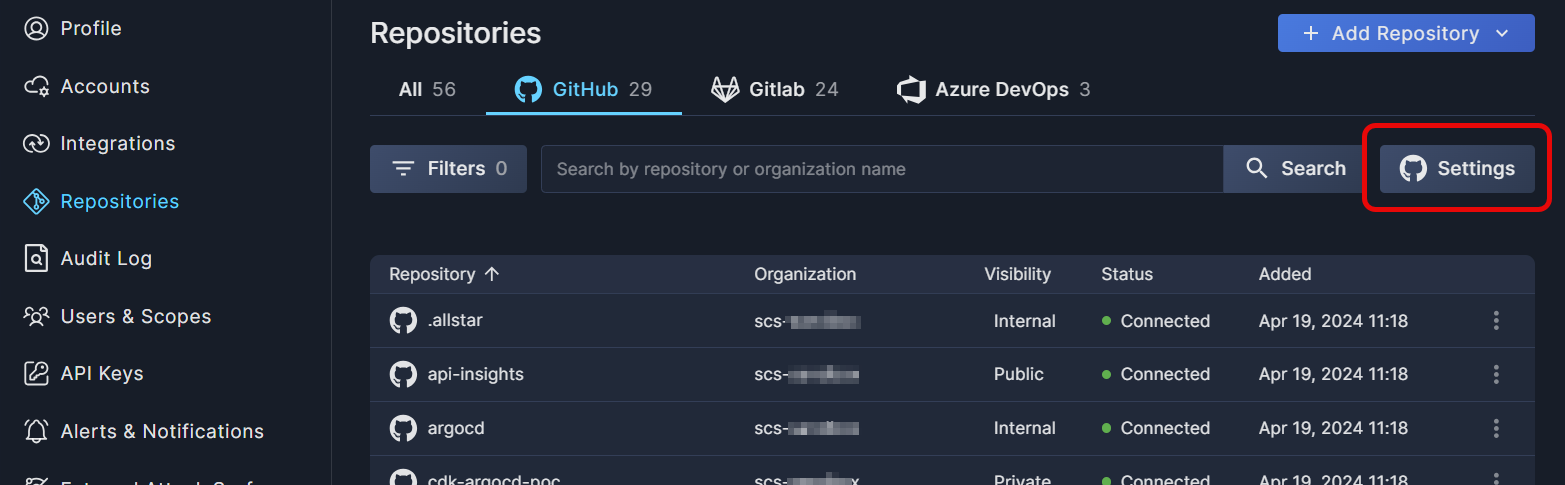
After your GitHub repository is integrated with Panoptica, browse to the Settings tab in Panoptica's main navigation pane, then select Repositories. Select the GitHub subtab, and click the Settings button to open the GitHub Settings overlay.
The GitHub Settings window is where you enable the PR scanning, and configure your scanning preferences.

- Click the toggle beside Scan pull requests to enable or disable scanning.
- There are three scanners that make up the PR Scanning function. You can choose to enable/disable each scanner by clicking the toggle beside them.
- IaC misconfigurations – You can select the severity threshold for which findings will be identified.
- Secrets – You can choose whether to detect secrets in files that were changed in the PR (“Only new changes”) or all files in the repository (“Full repository”)
- Code weakness (CWE) – You can select the severity threshold for which findings will be identified.
Don't forget to click Save Changes to, well, save changes.
Scan results
Once enabled, Panoptica checks will appear directly in your GitHub environment for newly created PRs.

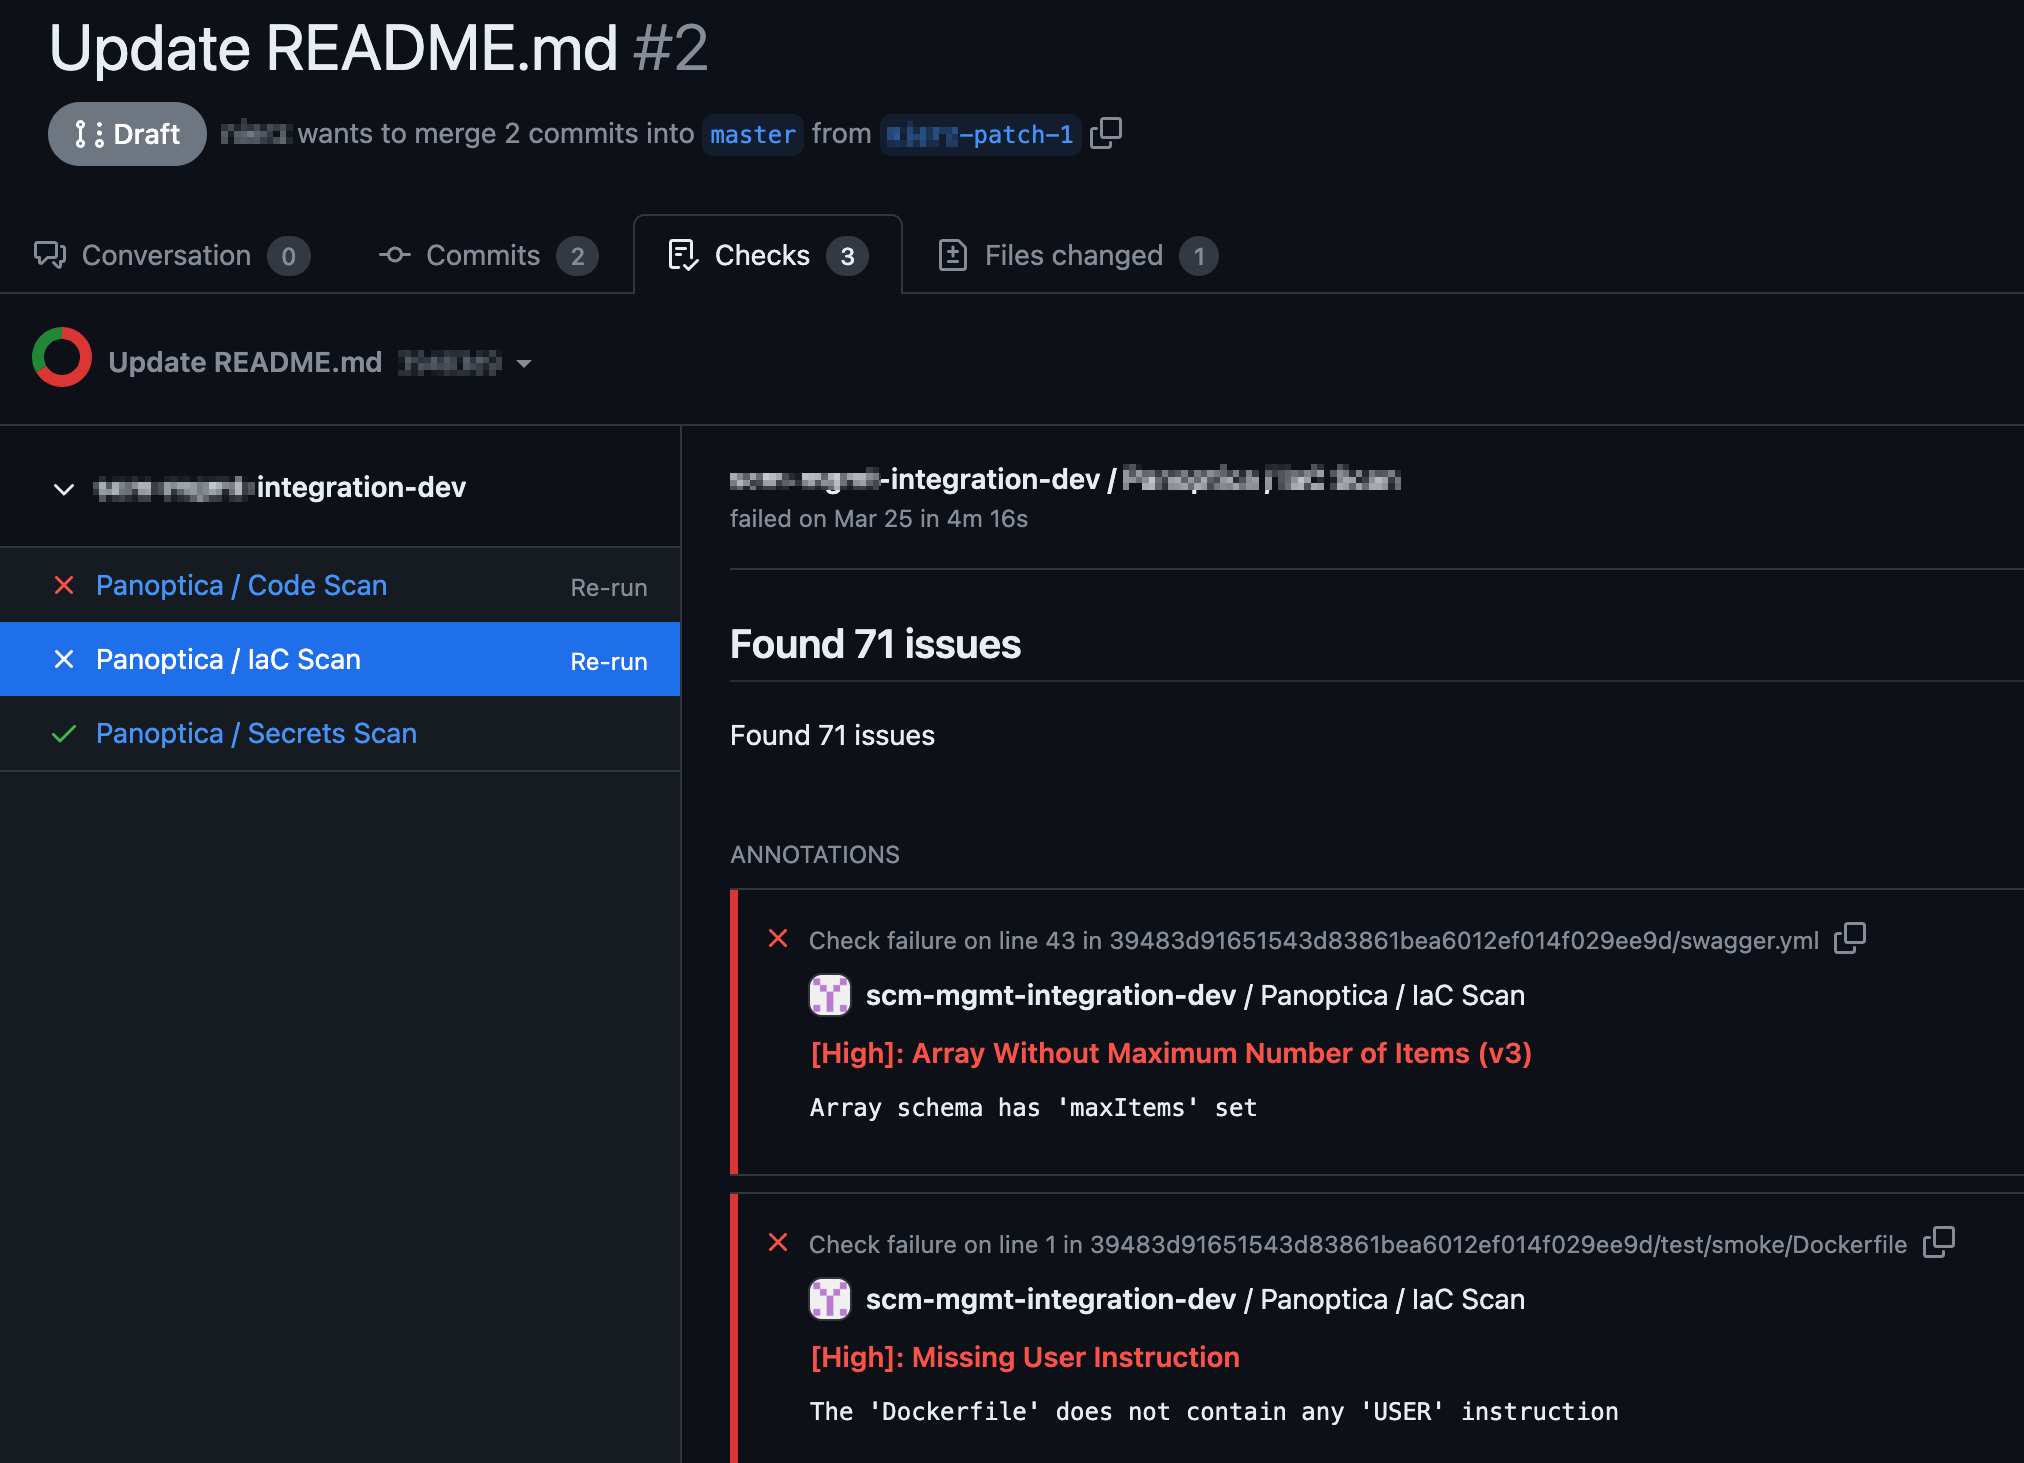
Checks tab
Detailed scan results will be displayed on the Checks tab in your GitHub environment. In addition to a summary of the findings and their severity level, you can click through to delve into the specific code snippet that triggered the finding, enabling you to analyze the issue in detail and implement a solution.
Updated 11 months ago