AWS Workload Scanning - Details
Overview
Panoptica scans the EC2 instances and ECR images in your AWS accounts for CVEs and malware. Panoptica also scans your VMs for weak passwords in the local user accounts. Neither of these scans require installation of any agent.
You can configure the scanning when you onboard your AWS accounts. In Simple Mode, workload scanning is enabled by default. Advanced Mode provides options to customize the scan, via the Workload Scanning toggle. If you disable Workload Scanning, Panoptica will not scan your EC2 instances, but ECR images will continue to be scanned.
In order to minimize impact to your environment, the scanning uses an orchestration layer that takes snapshots of the instances and scans them offline. In Advanced Mode, you also have the option of choosing where the scan takes place:
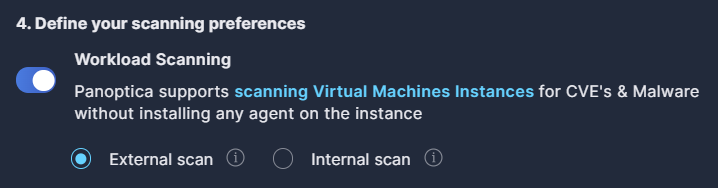
- External scan scans the snapshots using an Panoptica account that is external to your account. This calls for less internal resources, but requires sharing (not copying) the snapshots.
- Internal Scan scans the snapshots using a dedicated account in your environment. This improves performance, and keeps your data within your environment.
If you select Internal Scan, you will need to provide the Account ID of the account where the scanning will take place.
Any CVEs found are then prioritized based on several parameters and sent to the graph database to enrich the risk insights. For more on Panoptica's CVE Management capabilities, see Vulnerability Management.
OS Weak Password Detection
Panoptica automatically checks for weak passwords among local users in your Linux and Windows VMs, to safeguard your environment against unauthorized access. By comparing your hashed passwords to hashes of known weak passwords, Panoptica can identify local users that do not adhere to strong password policies, either in privileged or non-privileged accounts. Weak passwords in local user accounts are reported as risk findings in the Security Posture tab.
Weak Password Detection is active for any account where workload scanning is enabled. No additional action is required.
Supported OS Versions
Panoptica's CVE scanning supports the following operating systems and versions in AWS:
| OS | Version |
|---|---|
| Alpine | 3.3 and later |
| Ubuntu | 14, 16, 18, 20, 21, 22 |
| Debian | 8, 9, 10, 11 |
| RHEL | 5, 6, 7, 8, 9 |
| Fedora | 32, 33, 34, 35 |
| Oracle Linux | 5, 6, 7 |
| CentOS | 6, 7, 8, stream8, stream9 |
| AlmaLinux | 8, 9 |
| Rocky Linux | 8 |
| Amazon Linux | All |
| FreeBSD | 10, 11 |
| openSUSE | tumbleweed |
| openSUSE Leap | 15.2, 15.3 |
| SUSE Enterprise | 11, 12, 15 |
| Raspbian | Jessie, Stretch, Buster |
Scanning Process
Whether implementing Internal or External scanning, the process is similar:
- Panoptica creates a snapshot of the scanned machine's operating system volume.
- The snapshot is shared with the scanning account
- The scanning account launches a spot fleet based on Panoptica's CVE & Malware scanning image.
- One of the spot instances receives the scan request and performs these steps:
- Create a volume from the shared snapshot
- Delete the snapshot in the scanned account
- Attach the newly created volume and scan it for Malware and CVEs
- If Data Scanning is enabled, this takes place after the CVE scan.
- After the scanner machine finishes the scan, it deletes the scanned volume, and is available to handle a new scan.
- After an idle time threshold defined by the platform, the scanner spot instance will delete itself
Assets Created
When you enable workload scanning, Panoptica creates assets to support the scanning in every region where you have EC2 instances to scan. If you add new regions after initial deployment, Panoptica will dynamically identify the need to create the necessary assets there as well. Once created, however, Panoptica will not delete the infrastructure, even if you remove your assets from that region.
Internal scanning:
These assets are created in the scanning account you define at onboarding to support the internal scanning process. No assets are created in any of your other accounts.
Resource availability
Before specifying the scanning account, verify that the account has not reached its quota limits for any of these resources, particularly the VPC.
- Role
- Instance profile
- VPC - There must be 1 spare Virtual Private Cloud available to support this.
- Subnet
- Internet gateway
- Route table
- Route
- Route table association
- Security groups
- KMS key and alias
- Launch template
External scanning:
- Role
Permissions
In order to create snapshots, share them, scan the volumes, etc., Panoptica requires some basic permissions in your AWS environment. These permissions are configured by policies in the CloudFormation Stack you run at onboarding.
You can view the required permissions, according to the scanning method selected, in the cloudformation script.
- For Internal scanning, see
"PolicyName": "panoptica-internal-ec2-scan" - For External scanning, see
"PolicyName": "panoptica-external-ec2-scan-policy"
Roles and Permission
For further details regarding the roles and policies you create when onboarding your accounts, see AWS Onboarding - Roles, Policies, and Permissions.
Updated 7 months ago