AWS S3 Bucket Integration
Panoptica's AWS S3 Bucket integration enables you to send SIEM results from Panoptica – security findings and attack paths – to an Amazon S3 bucket.
System Prerequisite
A customer-specific role has been created on the platform AWS account, for the purpose of Data Lakes integration.
In order to configure the integration, first generate an access policy for your Amazon A3 bucket in the Panoptica console UI, then add the policy to the bucket permissions in your AWS Management Console.
Generate Access Policy
-
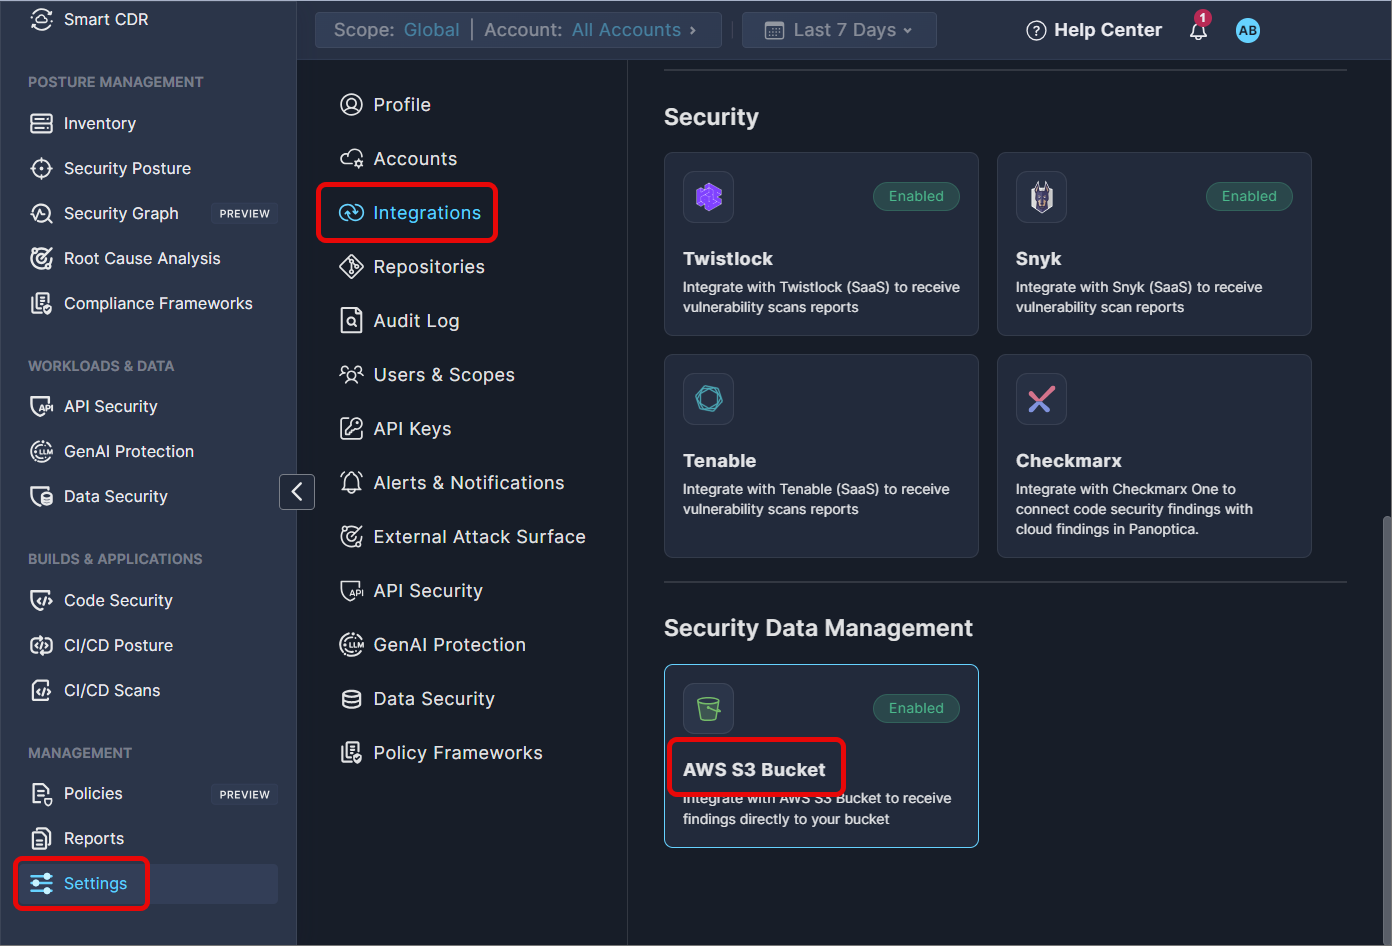
Click Settings in Panoptica's main navigation pane, then select Integrations.
-
Select AWS S3 Bucket in the Security Data Management section to open the configuration screen.
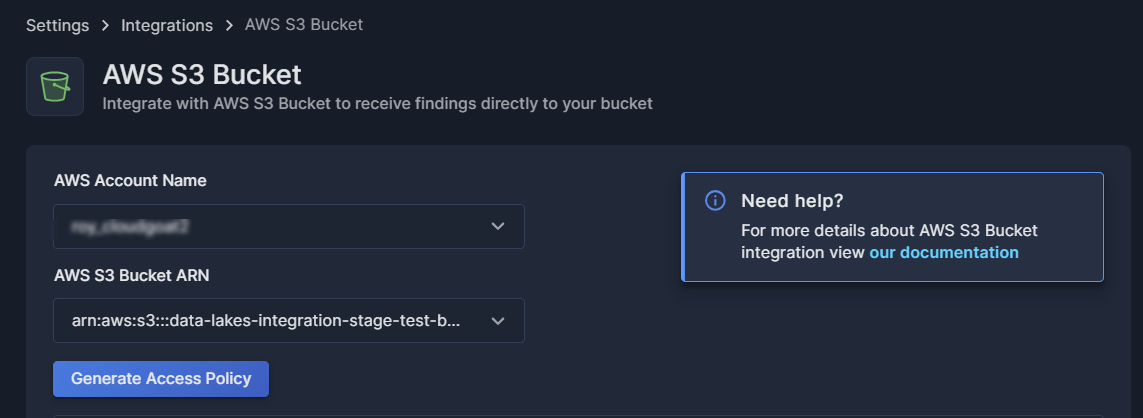
- Enter the Account Name and S3 Bucket ARN
- AWS Account Name: Select the account from the drop-down list of onboarded AWS accounts. You can type part of the name to narrow the selection list.
- AWS S3 Bucket ARN: Select the ARN from the drop-down list of S3 Buckets. Again, you can type part of the name to narrow the selection list.
- Click Generate Access Policy to generate a customized policy specific to the bucket you just defined. This will enable Panoptica to access the designated bucket for storing SIEM results.
The policy will take the following form:
{ "Version": "2012-10-17", "Id": "PolicyID", "Statement": [ { "Sid": "StmtID", "Effect": "Allow", "Principal": { "AWS": [<Dedicated Role>] }, "Action": [ "s3:AbortMultipartUpload", "s3:GetBucketLocation", "s3:GetObject", "s3:ListBucket", "s3:ListBucketMultipartUploads", "s3:PutObject", "s3:PutObjectAcl" ], "Resource": [ <S3 bucket ARN>, <S3 bucket ARN>/* ] }, { "Sid": "Stmt1", "Effect": "Allow", "Principal": { "AWS": [<Dedicated Role with permissions>] }, "Action": "s3:PutObject", "Resource": <S3 bucket ARN>/*, "Condition": { "StringEquals": { "s3:x-amz-acl": "bucket-owner-full-control" } } } ] } - Copy the policy. For convenience, use the Copy button in the corner of the text field.
Add policy to bucket permissions
-
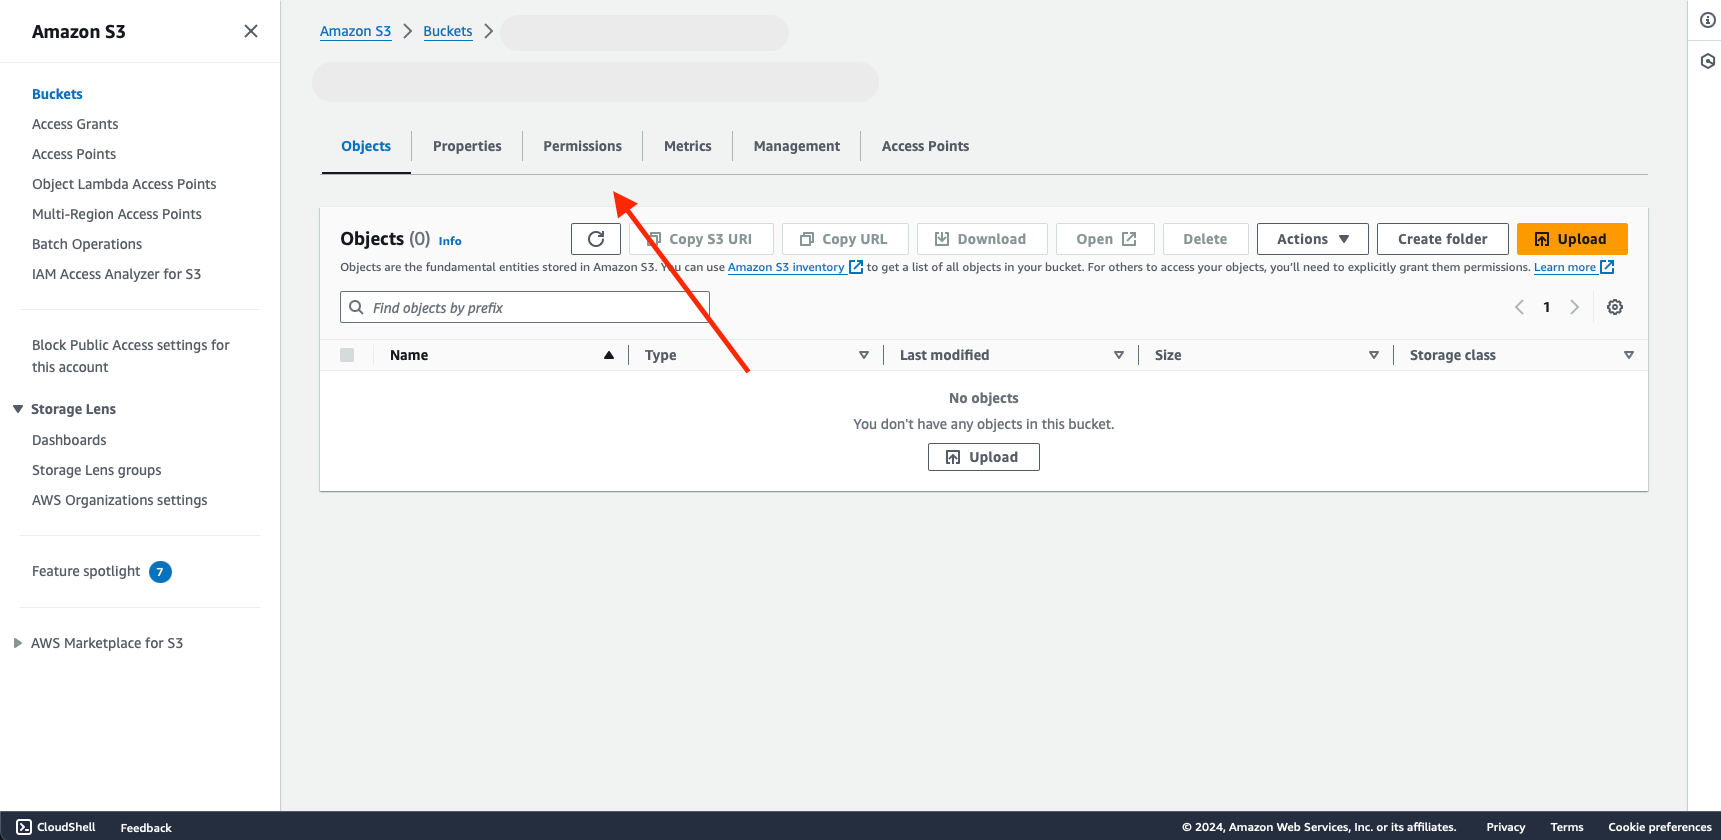
After the policy is generated, a link will appear above the policy code in the Panoptica console UI. Click the AWS Management Console link to open your Amazon S3 Bucket console in a new tab.
-
Go to the Permissions tab.
-
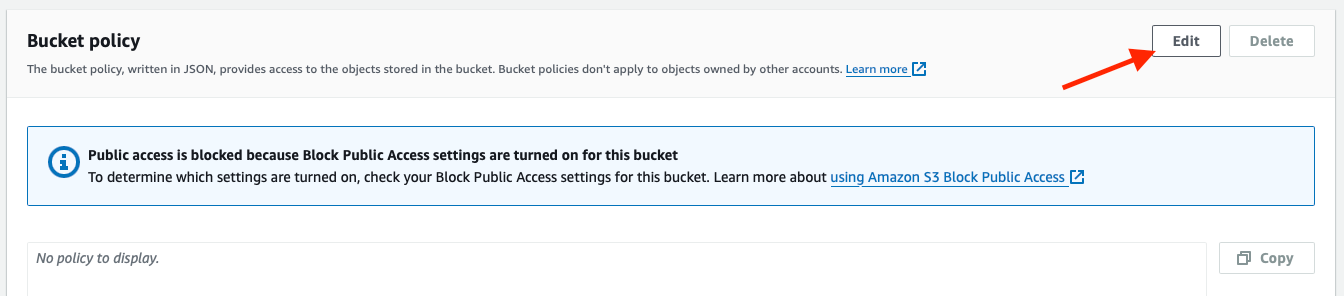
Scroll down to the Bucket policy section and click Edit.
-
Paste the policy you copied from Panoptica, and save it.
Now you're ready to Test and Save the Amazon S3 Bucket integration, back in the Panoptica UI console.
Click Test Message to send a single test message to the bucket you just configured. If the message is sent successfully, the test will be marked as successful. If not, see the error message for guidance in resolving the issue.
Don't forget to click Save when you're finished. Clicking Save will send a test message as well.
Once defined, you will be able to send raw events and/or processed data to this data lake. See Alerts and Notifications for details.
Technical Limitations:
- Only one S3 bucket can be configured per customer.
- A delay of up to one minute can occur between the creation of an event and its transmission to the bucket.
- Data objects will appear in a dedicated path, in this format:
Panoptica/<event_type>/<YYYY-MM-DD>/<account_identifier>/<event_file>
Each object in the described path can include multiple events in JSON format, separated with a new line delimiter.
Updated 7 months ago