Alerts & Notifications
You can configure Panoptica to send alerts and notifications regarding the security of your resources to third-party platforms. Security alerts are configured in two steps: first define the delivery channels, then set up the alerts you want delivered to those channels. Alerts can be filtered by severity level to control their volume.
Note
You must define at least one delivery channel before creating an alert.
To get started, select Settings in the main navigation pane of the Panoptica console UI.
Delivery Channels
There are two types of delivery channels that can receive alerts from Panoptica:
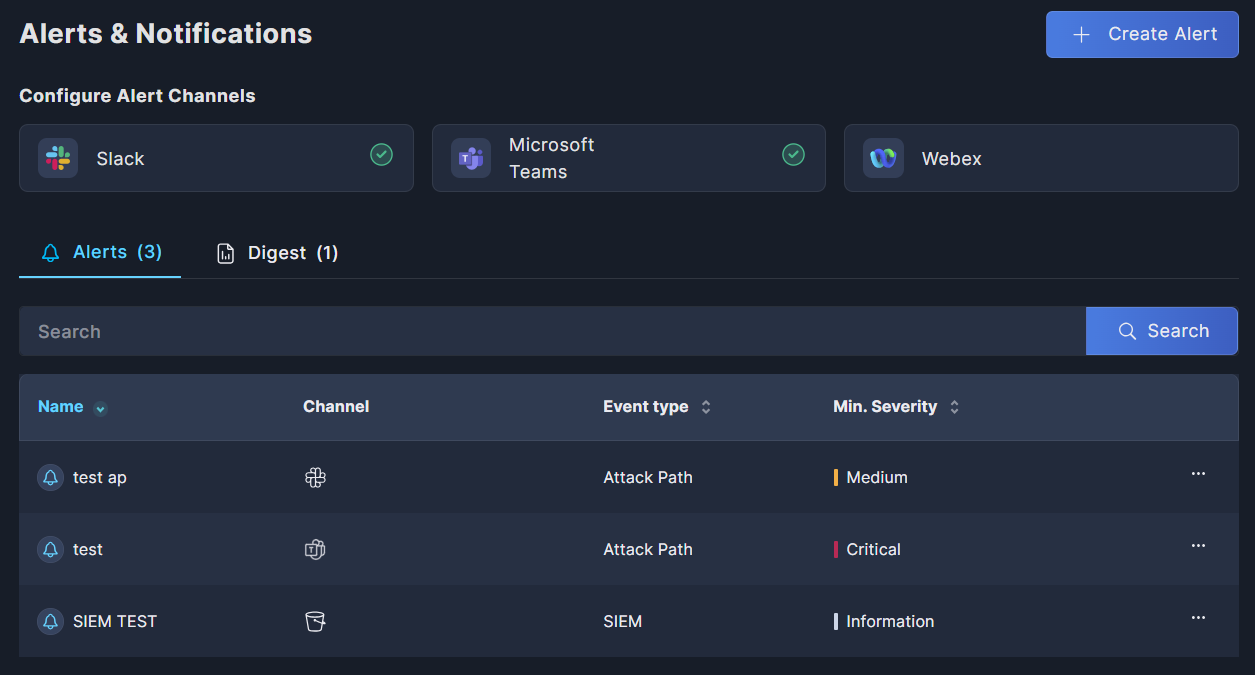
- Chatbot applications are configured on the Alerts & Notification tab:
- Data lakes are configured on the Integrations tab, under Security Data Management:
Create Alert
Once you have defined at least one delivery channel, you're ready to define the alerts that will be delivered to those channels. Select Settings in the navigation pane, and Alerts & Notifications.

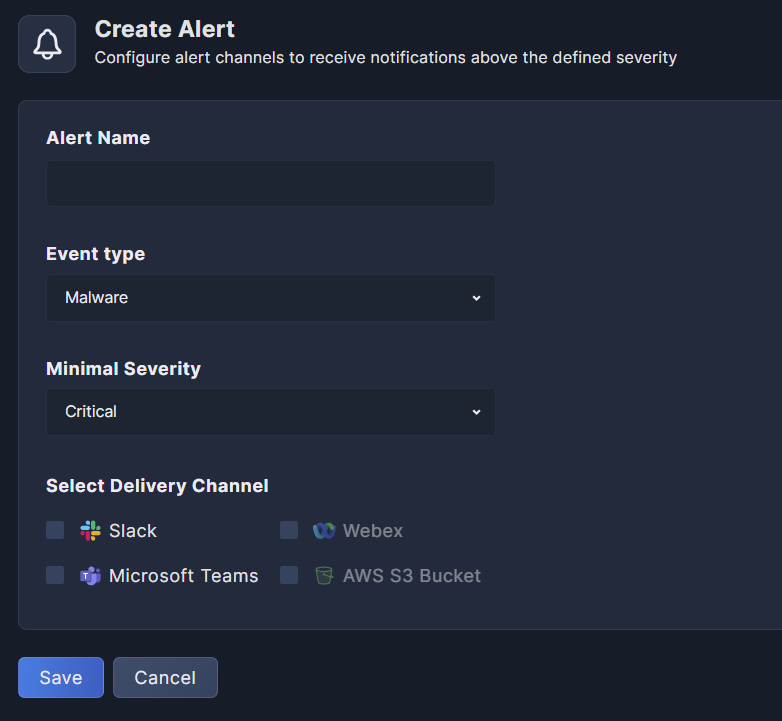
To define the content and severity of the alerts, click +Create Alert to open a pop-up form.
Complete the Create Alert form to configure each notification you want to receive.

- Alert Name: Give your alert a logical name.
- Event Type: Select the type of alert you want to receive:
- Malware – to receive notification about malware discovered in your environment.
- Attack Path – If you select Attack Path, a new field will appear where you can select the Attack Path category you want to be notified about. You can select more than one category.
- SIEM – to receive security findings and attack paths from Panoptica in an Amazon S3 bucket.
AWS S3 Bucket Integration needs to be configured first in order to receive SIEM results. - CDR – to receive realtime Cloud Detection and Response alerts. See Smart CDR for details.
- Minimal Severity: Select the minimum severity of alerts you want to receive: Critical, High, Medium, Low, Information
- Choose your communications channel: : Slack, Microsoft Teams, Webex by Cisco, or Amazon S3 Bucket.
Only channels that have previously been configured will be enabled. - Click Save.
All of the alerts you create will appear in the Alerts list on the Alerts & Notifications page.

Click the three dots (•••) to the right of each listing to Delete or Edit an alert
Updated 6 months ago
