Tenable Integration
Overview
Panoptica's Tenable integration enables you to view your Tenable vulnerabilities in the Panoptica platform. Panoptica retrieves findings using the Tenable API, and displays them in Panoptica's Vulnerability Management screen.
In order to configure the integration, you first need to retrieve some details from your Tenable account, and then enter them into Panoptica's console UI.
Retrieve Tenable Details
Log into your Tenable account to retrieve the API keys you'll need to configure the integration with Panoptica.
- Browse to the My Account page.
- Click the API Keys tab to access the API Keys section.
- Click Generate to access the Generate API Keys window.
- Review the warning about replacing previous API keys, and click Generate.
- Copy the new access and secret keys to a safe location.
Don't forget to copy the keys
Be sure to copy the access and secret keys before you close the API Keys tab.
After you close the tab, you will not be able to retrieve the keys.
See Generate API Keys in Tenable's documentation for details.
Integration with Panoptica
Now you're ready to configure the Tenable integration via Panoptica's Settings page:
-
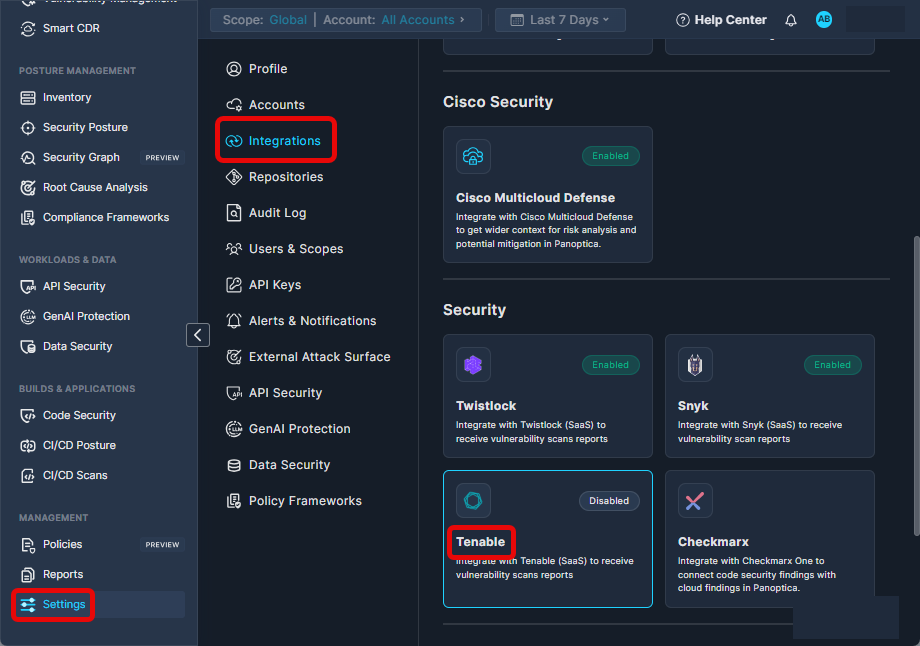
Click Settings in Panoptica's main navigation pane, then select Integrations.

-
Select Tenable in the Security section to open the configuration screen.

-
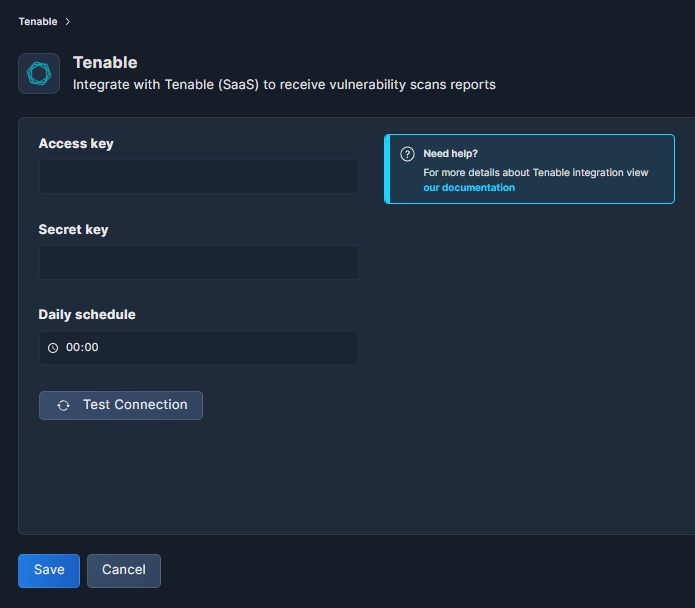
Enter the Access Key generated in your Tenable account (above).
-
Enter the Secret Key as well.
-
Under Daily Schedule, enter the time you would like the scan to take place.
-
Click Test Connection to make sure everything is in order.
-
Don't forget to click Save.
After the first Tenable scan is completed, you will be able to view your Tenable vulnerability findings in Panoptica's Vulnerability Management page. You can filter the results by selecting Tenable under Source Type in the Vulnerability Management filters.
Updated 7 months ago
